In a perfect world, every costume we fall in love with would fit us, and the costumes we already own would grow and shrink with us over the years. Unfortunately, that is not the case. Moving hooks and eyes on a bra or belt is relatively easy, and most skirts have some stretch or give as we change sizes. But the bra cups themselves are different - they're stiff and not so forgiving, as well as often covered in a lot of decorations. So what do you do if you have a costume that you absolutely love, but isn't the right cup size? The answer is - it depends. If the cups are a little too big, your solution could be simply padding the bra. If the cups are too small, or the cups are way too big for padding to help, there are several other options. Here are hyperlinks to their sections below.
~Replace the Cups~Add or Remove a "Pie Slice"
~Add Material
The first option is to simply remove the current cups and replace them with cups in your size. Replacing the cups sounds like it's a lot of work. That's because it is. But believe it or not, it may be the simplest solution. Covering and beading the new bra cups will take time, but depending on how the bra cups are decorated, this may be the best solution to give you a flawless, finished product that fits you.
How do you go about it? First, find the new cups you want to use as your bra base. You may choose costume cups, or a firm bra, or you may even choose to make custom cups out of interfacing yourself. If you're a particularly difficult size to find, here's a way to make your own custom bra cups from scratch out of duct tape:
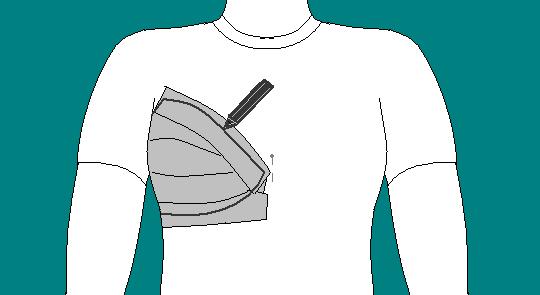
Put on a old tee-shirt over a bra that lifts and supports you the way you'd like. Then pin your tee-shirt to your bra in the center front and to the far side (off the cup) of one of your breasts. (Don't overly stretch the tee-shirt, because stretched fabric will make your duct tape model shrivel once it's no longer on you.) Cover the cup area with strips of duct tape, pressing the tape against the bra underneath so that it mimics its shape of your bra cup as closely as possible. When your breast is completely covered, draw with magic marker where you want the edges of the cup to be (top, bottom, side). Cut it out on the lines you drew (this will destroy your old tee-shirt).
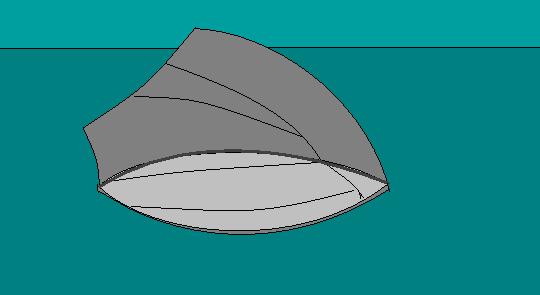
Press the bottom half of the cup flat on a table - as flat as you can get it to be. Odds are you'll be able to get an eye-shaped section to lay flat. Trace this shape with the marker and then cut it out. Now take the remaining duct tape model and try to lay it flat on the table. If it can be flat as it is, great - if not, get as much of it flat as you can starting from the bottom, draw the new edge and cut that out. What you're doing is making patterns of the shapes of flat interfacing it will take to mimic the curves of your breasts. When you lay your flat pattern pieces (probably 2 or 3 pieces total) on the interfacing, make the interfacing pieces have a margin of 1/4 an inch all the way around, so that the pieces will over lap each other by half an inch. Pin them together, and zig-zag stitch them in place. Now, take off your bra and hold the cup up to your breast and see how it feels - if it doesn't fit perfectly, or you need to adjust it, realign the seams. You can even cut out slightly different pieces if your first try doesn't work just right. Interfacing isn't very expensive. Once you're happy with the shape, you can add an underwire if you would like. If you can't find an underwire in your size to buy or one from an old bra, go to the hardware store and buy stiff enough wire. Sew a casing on the bottom of your cup either by hand or with a machine. Be sure to bend the ends of the wire so they don't pierce your fabric over time. Make one to match for the other side, and you now have custom cups!
Once you've got new cups, remove the old cups from the costume. To do this, you may need to carefully remove and reserve the decorations that overlap the edge of the side strap and the bra cups. Cover your new bra cups with decorative fabric, and then attached the straps to the new covered bra cups. When you're happy with the fit of the cups and straps all together, decorate the new cups with the beads from the old cups, trying to blend and hide the old and the new of the costume.
You can see me going through the process of completely replacing the cups of a costume on my Half Made Blue Faux-Bella costume project tutorial. There is a series of YouTube videos embedded in order, and links to the tutorials that explain the steps used in each video.
Another solution that can make an existing cup bigger or smaller by up to two sizes is actually somewhat similar to breast-reduction surgery. Reduction surgery on the breast involves removing a pie-piece shaped part of the boob from the nipple down to bottom of the breast. Since it's on the bottom half of the breast, the resulting scar isn't visible when clothed and looks like an anchor. Unlike surgery, for costumes - especially costumes with underwires - it's a lot easier to take out or add a pie piece on the top half of the cup (from the nipple to the top of the cup), but it is essentially the same concept. Why would you choose this method? Maybe the cup is so covered in decorations that the seams of an added or removed pie piece wouldn't be noticeable once beaded, but the complete replacement of the cups would be a tremendous amount of work.
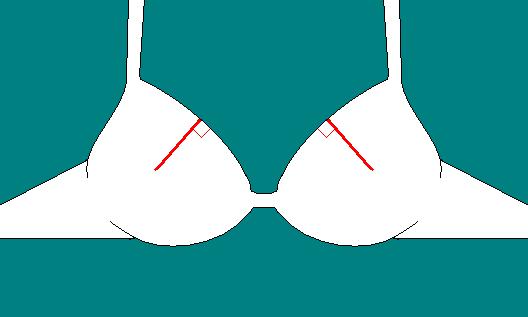
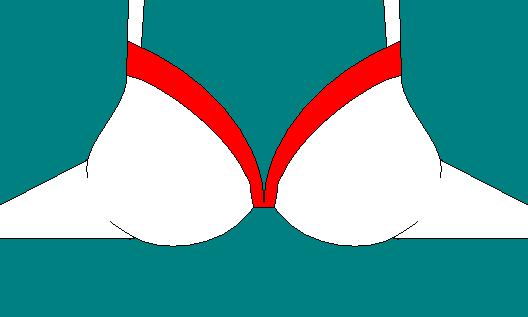
How do you go about it? First, draw a line with chalk or soap (or just your mind) from the apex of the cup (nipple area) to the top edge of the cup where the line is perpendicular to the edge of the cup. In the drawing above, look at the red lines. The boxes indicate that the lines are at a right angle to the edge of the cups. This line may not be perfectly vertical while wearing the cup - it might actually point towards your face when wearing the bra. Carefully remove the decorations at least an inch away from that line. Then using your sharpest fabric scissors, cut the whole cup along that line, all the way to the apex. To make the cup smaller, cut mirror imaged narrow pie pieces from either side of that line, so that if the new edges are "closed" or brought back together, the cup is now a smaller size. If you want to make the cup bigger, cut the line and then put the bra on. Lay a scrap peice of interfacing underneath your bra, over your breast, under the new cut slit. With a pen or marker, draw the pie piece shape the empty space within the opened slit makes, making sure to follow the curve of the top of the cup. Without adding a seam allowance, cut it out. If you want it to be thicker or stiffer, cut a second one of the same shape and sew them together. Insert your pie piece and using a spiral stitch, sew the cup and interfacing edges together using very strong "button and craft thread". Take some decorative fabric that matches the cups, and cut it to be a little larger than the pie piece shape, or just big enough to cover the new seam from a reduction. Folding under all the raw edges, spiral stitch the fabric to cover the alteration. Then decorate the addition, or substraction, to blend in the alteration. After your beading is done, you can add a whole new lining if you want, or just add a patch inside.
I once used this method to alter a Topkapi Turkish costume that was completely covered in copper colored sequins. Because the sequins hid the seams, I felt this was an ideal solution to turn that C cup costume into a DD cup costume. The result looked flawless, if I do say so myself.
Sometimes our cup doth runneth over, so to speak. Maybe the diameter of the cup is just fine for your breast size and it supports you well enough, but for the sake of modesty you just want a little more coverage than a costume is currently giving you. A simple solution to that is to add fabric above the top of the cups. It doesn't even necessarily have to be reinforced fabric, if your breasts aren't bulging out of the existing cups. Fortunately this method doesn't take a lot of sewing skills. Unfortunately, it isn't visually compatible with all styles. In fact, it can be difficult to make sure it doesn't just look like you shoved a veil in your bra.
Ways to camouflage your addition can include beading it to match, or even beading it to contrast. Add a matching band of the new fabric or decoration across the top of the matching belt or skirt so that the addition seems like it was part of the original design. Every costume is different, so the solution that works best for yours is a question you'll have to answer.