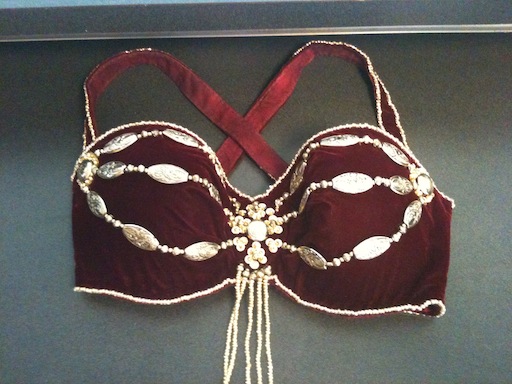
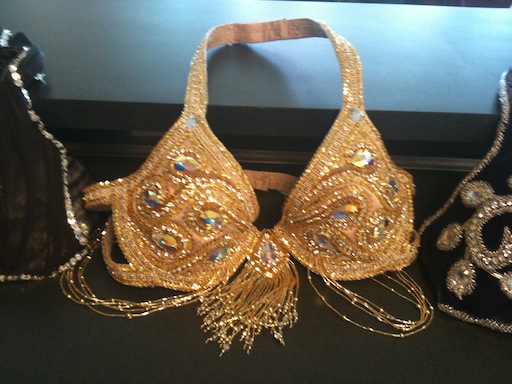
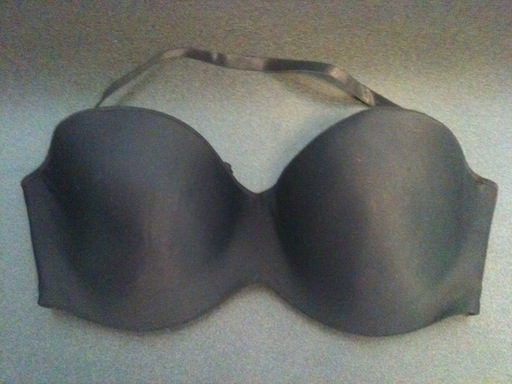
A decorated costume bra is almost universally worn in all styles of bellydance. Before you can embellish your bra with fabulous beaded designs and fringe, you need to cover your bra base in fabric. Each of those underlined words is a link to the section that discusses its topic in detail.
As discussed in the bra base page, you have a few options: cups where you add traditional non-stretchy straps, and complete "strapless" bras which come with their own stretchy side straps that you intend to keep. These two options will require slightly different covering methods. I've explained each in detail in the sections below.
~Cups with Non-Stretchy Straps
~"Strapless" Bra with Stretchy Side Straps
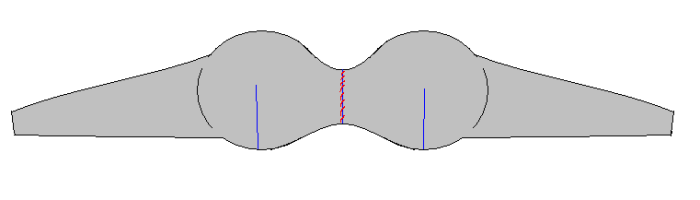
This method can be used with stretch or non-stretch decorative fabric. The cups you use could be sold as costuming cups, or could be a conventional bra with cups stiff enough to handle embellishment with its side straps cut off. The cups could already be connected to each other, or they could be unconnected. (Go to the bra straps page for a break down of straps, including the center connector strap that goes between the cups.) In most instances the straps that come on bras are too weak to handle the weight and added stress of embellishments.
Simply put, we cover the bra cups in fabric and then attach straps to them. You can leave the center connector that's already there and possibly reinforce it, or you could make a center connector strap. After the cups are covered, attach your straps to the back of the cups. The creation of all the non-stretch straps is covered on the bra strap page. This section will just cover the covering of the cups with fabric.
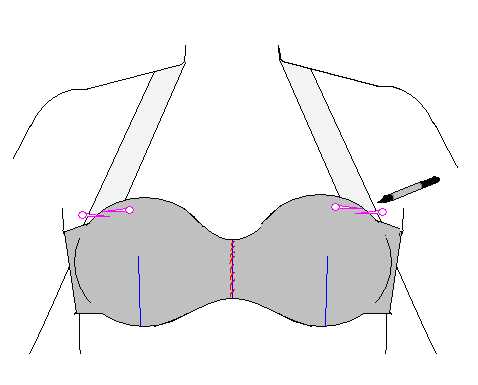
The first step is to prepare your bra cups by cutting off any ribbons, tags, or straps that are still in place. This may include the center connector, or may not.
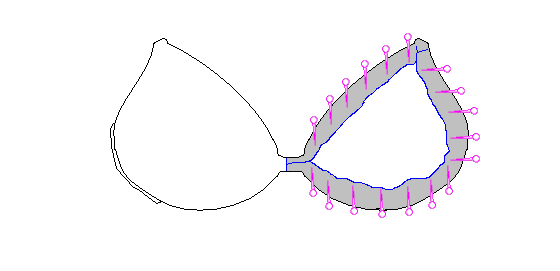
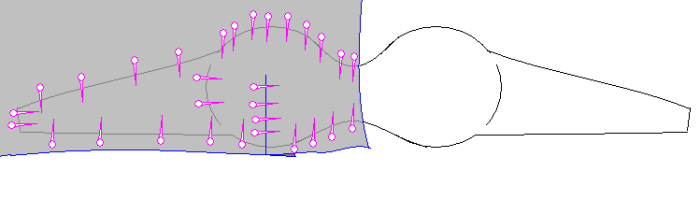
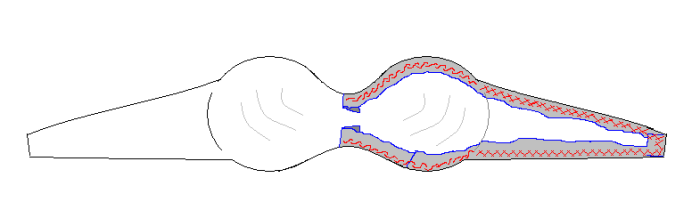
Starting in the center of the bra, lay your decorative fabric on one side of bra, pinning to the top edges of the cup. If your fabric has a pattern on it, or like velvets it has specific orientation, make sure it's arranged how you want it to be. Start at the edge of your fabric so there's less waste.
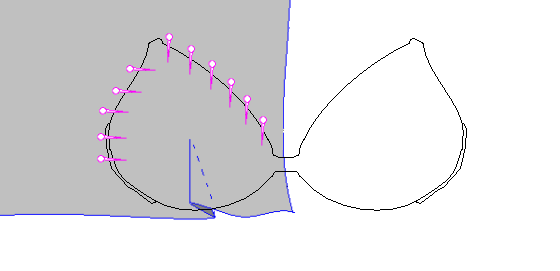
To fit our flat piece of fabric around the curved cups, we're going to make a dart. Essentially we're folding the excess fabric under itself, from the apex (nipple area) to the center bottom of the cup. Fold the extra fabric under, trying to make your seam as close to vertical as possible
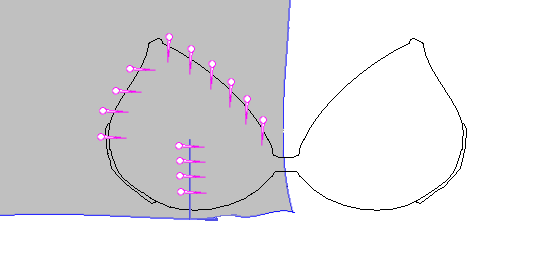
Pin the fabric to the rest of the cup. It's easiest to do this with the bra base laying flat on a table. The pins should always go in perpendicular to the edge of the cups.
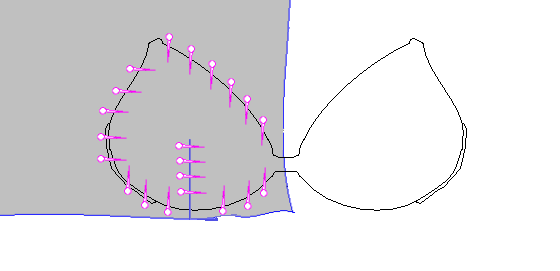
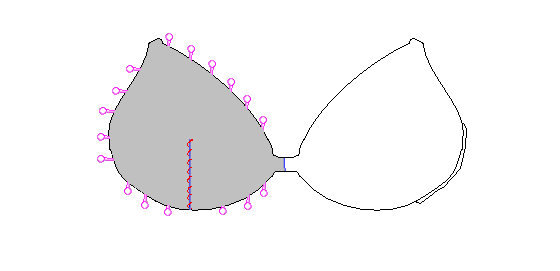
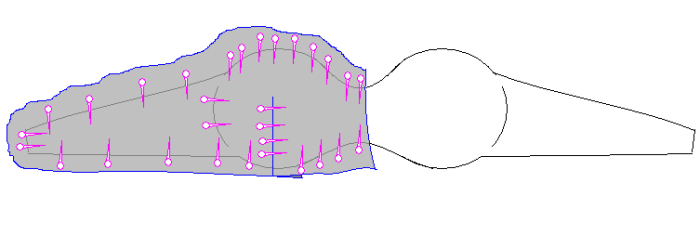
Trim off the rest of the fabric, leaving about an inch around the edges of the cups.
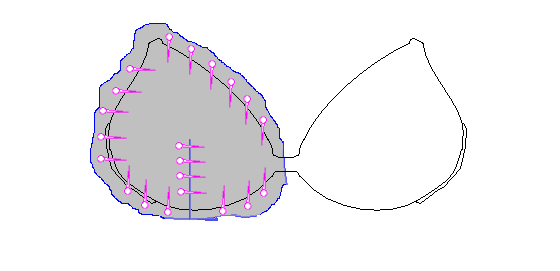
Fold over the raw edge of fabric to the inside of the cups and pin the fabric on inside. Fold under the center front edge (can also be left unfolded since the folded edge of the other side will overlap it). Outside pins can be removed and used on the inside.
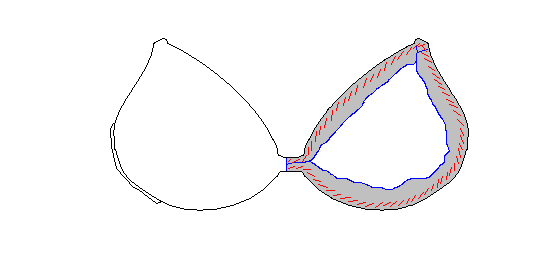
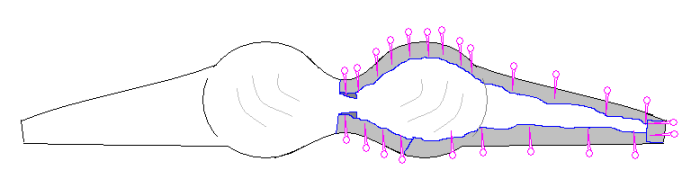
Using a spiral stitch, hand sew the dart. These stitches only need to catch the fabric, and do not need to puncture the base except possibly at the beginning and the end, where your knots will be.
Spiral stitch the fabric inside the edge of the cup, catching the inside of the cup, to hold the fabric in place. These stitches will not be visible on the outside. If you'll be doing a beaded edge on the finished bra that will hide visible stitches, you could save time here by using a sewing machine with a straight stitch. A sewing machine, however, may find it difficult to handle any underwired parts of the cup.
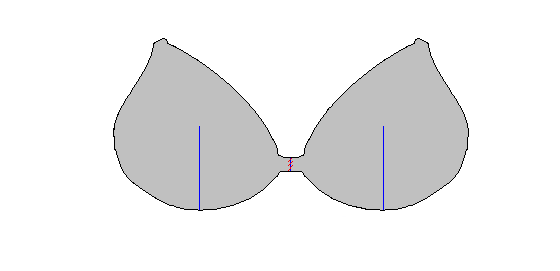
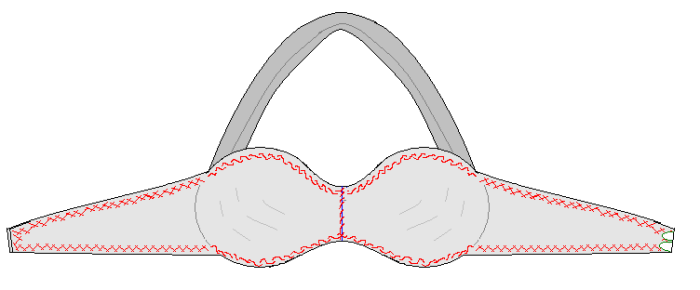
Repeat everything you just did for the other side of the bra, and then spiral stitch the center front seam closed. If you use a new center connector strap instead of the original connector, attach it to the cups with a hand chain stitch or machined straight stitch.
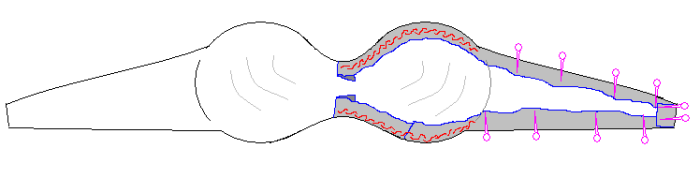
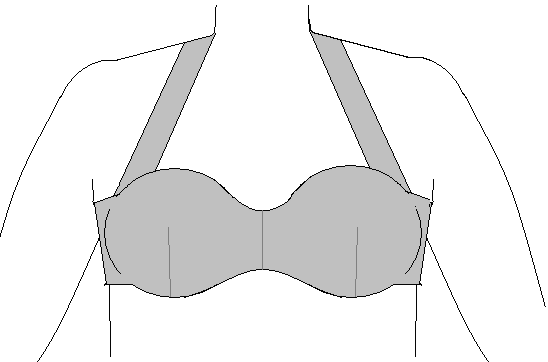
Follow the instructions on the bra straps page to create and attach the rest of your straps to the bra. Then you can start decorating your bra! Check out the design page and the pages on beading and beaded fringe and swags for tips on how to embellish your new costume. After you've added all of your embellishments, line your costume. Thin acetate linings are commonly used, but a light linen will actually wick away sweat better. Attach your lining by following the same steps you used to cover your bra, only on the insides. Creat a dart, but it may not be necessary to sew it shut. Spiral stitch the folded-under edge of the lining to the edge of the covered bra.
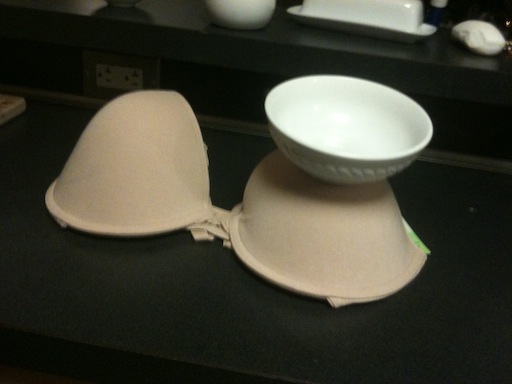
This is the method I use with Lilette brand strapless bras (discussed on the bra base page), or any bra like it with heavy-duty elastic sides. The side straps are unusually sturdy and can handle edging emblishment, though I wouldn't recommend completely covering them in sequins or beads. The method described below is meant for stretch fabric, since you want the fabric to stretch with the elastic. (I have used the Lilette bra and elastic side straps with a non-stretch velvet, but I had to make sure that the side straps/panels were the perfect size so that when worn it laid flat. If I gain weight the non-stretch velvet won't be forgiving, but if I lose weight the elastic will compensate for it. I really just did it because I'm impatient and couldn't find the velvet I wanted in a stretch fabric.)
The first step is to prepare your bra by cutting off any ribbons, tags, or shoulder straps that are still in place. There may be loops for hooks on the side straps that could connect to removable elastic shoulder straps - cut them off without damaging the side straps.

Starting in the center of the bra, lay your decorative fabric on one side of bra, pinning to the top edges of the cup. If your fabric has a pattern on it, or like velvets it has specific orientation, make sure it's arranged how you want it to be. Start at the edge of your fabric so there's less waste.
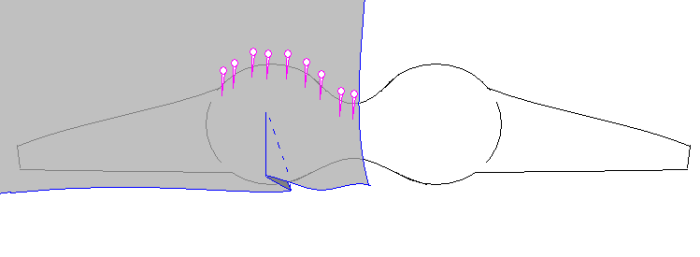
To fit our flat piece of fabric around the curved cups, we're going to make a dart. Essentially we're folding the excess fabric under itself, from the apex (nipple area) to the center bottom of the cup. Fold the extra fabric under, trying to make your seam as close to vertical as possible
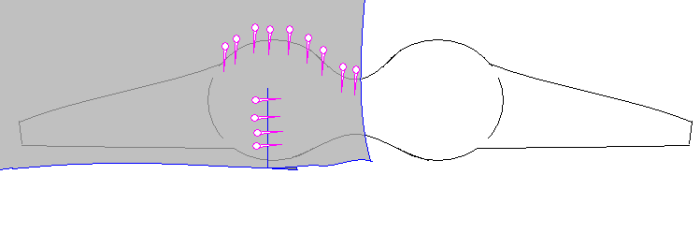
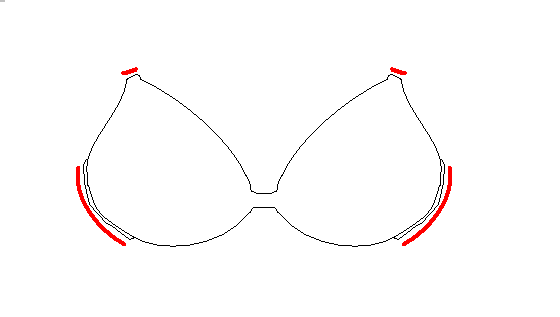
Pin the fabric to the rest of the cup and side straps. It's easiest to do this with the bra base laying flat on a table. Don't stretch either the bra base or the fabric as you pin them together - just lay one on top of the other. As you can see in the illustration, the pins always go in perpendicular to the edge of the bra base.
Trim off the rest of the fabric, leaving about an inch around the edges of the bra base.
Fold over the raw edge of fabric to the inside of the bra base and pin the fabric on inside. Fold under the center front edge (can also be left unfolded since the folded edge of the other side will overlap it). Outside pins can be removed and used on the inside.
Using a spiral stitch, hand sew the dart. These stitches only need to catch the fabric, and do not need to puncture the base except possibly at the beginning and the end, where your knots will be.

Spiral stitch the fabric inside the edge of the cup, catching the inside of the bra base, to hold the fabric in place. These stitches will not be visible on the outside. If you'll be doing a beaded edge on the finished bra that will hide visible stitches, you could save time here by using a sewing machine with a straight stitch. A sewing machine, however, may find it difficult to handle any underwired parts of the cup.
Using a zig zag stitch, hand sew the fabric to the side straps. These stitches will not be visible on the outside. However, as before if you'll be doing a beading edge on the finished bra you could save time here by using a sewing machine with a zig zag stitch. The zig zag is necessary to allow the sides to stretch.
Repeat everything you just did for the other side of the bra, and then spiral stitch the center front seam closed.
Sew on hook and eyes for your back bra closures.
Now try on your bra by itself. There are several bra strap options you can take: regular shoulder straps, halter straps, asymmetrical straps (check out the straps page to see how non-stretch straps are made), or you could use extra strong elastic (non-roll) doubled up (two layers) in a fabric casing sewn to each cup as a halter. For B or A cup women, a single layer of elastic may be enough support. Keep in mind that elastic deteriorates over time when exposed to sweat, so though an elastic band halter strap may be much more comfortable, it may not be a durable as non-stretch straps.
In any case, use a measuring tape held at your chosen attachment points and write down how long you need your straps to be. Add a few inches per strap to those lengths so you can room for attaching them, and for non-stretch halters also add some length for the straps to overlap behind your neck. Create your straps as described on the straps page. It's important to attach your straps at the correct angle. There is no one correct angle - it will depend on your shape. So the easiest way to figure it out is to experiment. Pin your straps to your bra cups with your best guess. If they're attached to side straps in the back, fish your shoulder straps underneath the straps in the back so that you can easily adjust them, but the tension of the side straps against your rib cage will hold them in place. If necessary, change where and how your straps are pinned to the cups in the front. When you're happy, use straight pins to mark on the strap where the cup edge is (parallel to the cup edge) and put another pin on each cup to show where the sides of the shoulder straps line up (parallel to the sides of the strap). This will help you find that correct angle again once you've taking your bra off to sew it. Use a hand chain stitch or a machine straight stitch to sew your straps to the cups.
For the elastic band halter method, the length of your straps can be harder to determine. Pin the bands in place where they will be attached to the cups at the tension you want. Unlike when we're using pins while sewing, you want these straight pins to be perpendicular to the force being put on them (see image below). This is a stronger orientation and will allow you to temporarily pin the elastic in place and move around in the bra to be sure if that tension feels comfortable.

Mark your elastic with magic marker, a pen, chalk, or a shard of colored soap. Your mark will be where the edge of the cups crosses the elastic, but you want the elastic to be an inch or so longer on either end so you have some room to attach it.
For the elastic band halter, create a casing for your elastic band halter by making a rectangle out of stretch fabric that is twice the width of the elastic plus one inch, and the length of the un-stretched elastic plus one inch. Sew it shut along the long side using a zig zag machine stitch, with a 1/2 inch seam allowance. It's important to use a zig zag stitch because otherwise the seam won't stretch. Turn it right side out, and fish your elastic through it. Check out my neat chopstick trick on the circle skirt page to make fishing the elastic through easier. You may want the seam to be centered on one side of the strap so it can be hidden against your skin when you wear it. Follow the method explained above for figuring out the correct angle at which to attach the elastic strap.
That was a lot of work. But you've only just begun. Now you get to decorate your bra! Check out my pages on design, beading, and beaded fringe and swags for advice on how to embellish your newly covered bra.
When you're finished, you can add a lining. For the bras with stretchy side straps that were part of the original bra base, you'll need to line your bra with stretch fabric and use a hand zig zag stitch on the side straps so that they will stretch and so that the stitches won't be seen from the outside. These stitches will just knick the fabric on the back of the bra base. For the lining on the cups, fold in the extra fabric just like you had on the front, and use either a hand zig zag stitch or a spiral stitch to hold it in place along the edges of the cups. The cups won't stretch and the spiral stitch takes less time and thread.