
These are instructions for how to make the belt part of a "bedlah", or bra and belt set. There are a wide variety of shapes and styles of belts out there, but they're just variations on this generic model.
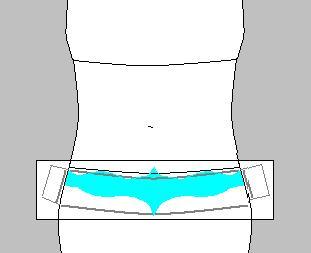
To start, cut out a rectangle of interfacing (the thickest there is) that is bigger than the front of the belt will be (30" by 8" will work) and while wearing a pair of jeans, press the interfacing on the front of your pelvis, smoothing it out, and pin it on the side seams of your jeans. Use a magic marker to draw on the interfacing along the top of your jeans (or an inch or two below it if they're high waisted jeans). For the basic belt shown below, draw another line about 3-4" below that (whatever width you want the belt to be), parallel to the top line. Draw vertical lines on each of your side seams.
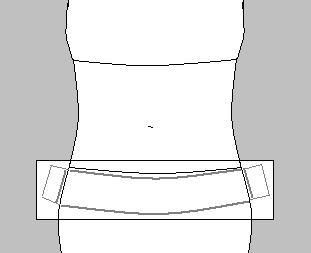
For more interesting shapes, you may want to go above the waist line. Feel free to draw shapes on your interfacing till you get what you want. Cut it out a little to the outsides of your lines, and then (if you want the belt to be symmetrical) fold it in half along the centerline and give it a final trim. I sometimes spend over an hour holding it up in a mirror against my pelvis, folding and trimming it some more, and then holding it up in the mirror again. If you cut off too much, interfacing isn't that expensive, and you can just use the first try as a pattern for a new one, omitting the mistake.
For the back, it's a very similar process. Start with a 30" by 10-15" rectangle of thick interfacing. Smooth the interfacing along the widest part of your butt and pin it to your jeans on the side seams. Mark the top, bottom and side seams, and add 2" tabs for attachment. These added tabs may not be necessary on the back as well as the front, but you can always remove them later. Since it may be difficult to draw on your own booty, you may want to ask a friend to help.
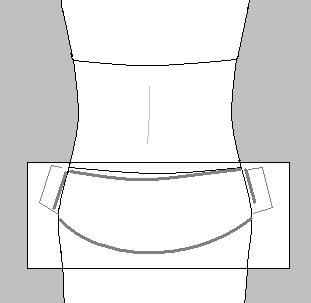
Again, feel free to make the belt a more interesting shape. Also if you want it to be symmetrical, fold it in half along the center line to trim up the edges. At this point, it's also important to compare the side seam marks on the front and back belts, because this is where the two panels will be overlapping. You probably want the two panels to be the same width so that visually they flow from one to the other.
Since the butt has curves, there will be a gaps on the back of the belt at the top and bottom. To fix that, we're going to add alternating darts - but first you want to cover the interfacing with your fabric so that the fabric will also be taken in by the darts.
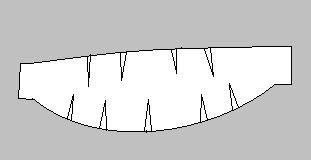
Once your back belt base is covered, fold it in half, fabric sides facing in, along the centerline of each of the dart locations. (Make sure that the edges of the belt are even with each other on the fold of each dart so that the resulting dart will not cause a jagged edge.) You will sew a really, really narrow dart. Start about a quarter of an inch from the fold and move closer to the edge of the fold over 4". Darts are like little right triangles, with the fold of the fabric as the long leg. You can always make the darts bigger if you need to. Fit it to the curves of your butt.
Now you have two options: decorate and then attach the two panels, or attach the two panels and then decorate. The first option makes it easier to resize the belt later, because none of the beading stitches will inadvertently be connecting both panels. The second option can make the decoration on the attached side much more seamless.
The front and panels will be sewn to each other on one of sides, and will be connected with hook and bars on the other side. I suggest you trim off the 2" tabs on the back panel, fold over the fabric and finsh the edges with a straight stitch, and then machine stitch or hand chain stitch the panels together. Then the 2" tabs on the front belt can be attached underneath the ends of the back belt.
For details about decorations, such as beading, fringe, and how to design a costume, check the other topics.