Once you've made your bra, belt or trumpet skirt, you'll probably want to decorate them. Using your hand sewing skills and your beading needle and button and craft thread, you'll be ready to get started. For a break down on common types of beads, go here.
Though it's simply called "Beading", this page will cover the use of most decorative notions, including sew-on jewels, diamond trim, sequins, shisha mirrors, coins and cowlry shells. Likewise, when I use the term "beading" below I mean for it to broadly cover the attachment of all types of decorations. One thing I don't cover on this page is beaded fringe and swags, which I cover here. Since there are so many subtopics, I will add centered titles to the sections so they're easier to scroll through. Here is the hyperlinked table of contents of this page:
~Beading Doodle Pad
~Fabric vs Bedlahs
~Beading in a Line
~Drawing Shapes
~Beading Shapes
.......~Sew-On Jewels
.......~Diamond Trim
~Filling in Space
.......~Positive Space
.......~Negative Space
~Shisha Mirrors
~Coins
~Cowry Shells
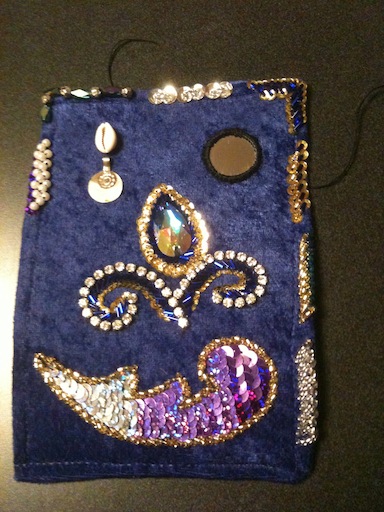
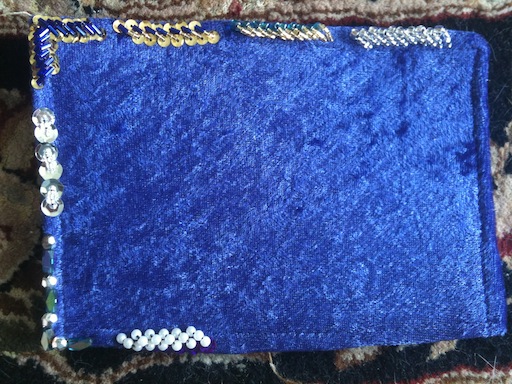
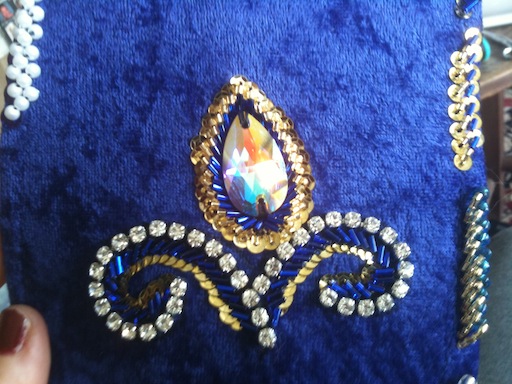
Whenever I'm about to decorate a new project, I like to make myself a beading doodle pad, so to speak, so I can figure out what looks best. I take a rectangular scrap of interfacing, cover it in a scrap of the fabric I've made my costume out of, and I bead on it in different ways to see what I like. Often what I had in mind doesn't look as good when I bead it out, and something else I doodled may inspire the whole costume from that point on. Making your mistakes on a beading doodle pad will protect the costumes you've worked so hard to make. This is also a good way to practice your beading skills. Cut your fabric to be a little bigger than your interfacing, fold the edges over, and straight stitch it (hand or machine) in place on the edges. Trim off any excess fabric from the back (leave about 1/8 inch from the straight stitch). Don't worry about wasting expensive beads on this - once you've got a plan you can always scavenge the doodle pad for parts later. You'll only be out the scraps of fabric and interfacing, and some thread.
The type of costume piece you're beading matters. When beading a bra and belt set (called a bedlah), what you're working with is typically not stretchy, and its interfacing is stiff enough to prevent stitches from denting the costume. But when working with stretch fabrics, such as on trumpet skirts, or non-stretch fabrics, such as on circle skirts, you run the risk of your stitches being too tight for the fabric to lay flat. Embroiderers use an embroidery hoop to prevent this, but if your fabric is made of velvet that will crush a circle into it. Also, an embroidery hoop will only help with non-stretch fabrics. I recommend instead that you lay out your fabric costume piece flat on a table (I use the wooden back of an old chair cushion on my lap), and just tighten your stitches enough that there are no loops of thread on the back (which could get caught on things). Also, for stretch pieces, make sure you're using stitches that can stretch (more info below).
Beading, like coloring with crayons, has two main functions: make a line, and fill a space. Learn more about this in the Design Tutorial. Many costumes have a line of beading all around the edge. The same types of beading are also used to outline shapes on the costume. Here are some typical line beading examples.
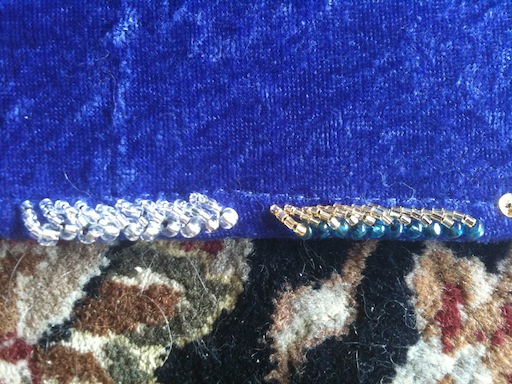
The first two we'll talk about are actually the same sequence of beads - four seed beads and an E bead (see the image below). But the first set is made of round silver seed beads and a silver E bead, and the second is made of hex-cut gold seed beads with a turquoise E bead. So we have here a comparison of different textures (round vs. hex cut seed beads), and different color schemes (monochromatic vs contrasting colors). This is the most common type of line beading you'll find in Cabaret costumes. It's everywhere. The number of seed beads varies, but tends to be between 4 and 8. This beading type, as well as many of the others, uses the diagonal stitch, which can stretch.
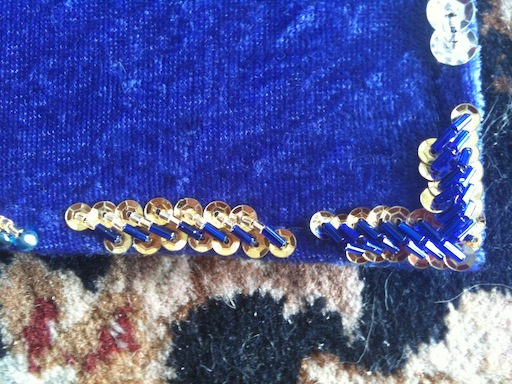
Our next two line beading examples are made of both beads and sequins. Each stitch has a sequin, beads in the middle, and another sequin. The first of the two has two gold seed beads and a blue bugle bead, and the second has two blue bugle beads. But the major difference between these two examples is how close together each of the stitches are. In the first one, the edges of the sequins touch but do not overlap. In the second they overlap by 50%. This creates a much different look, even though they are very similar. Since these sequins are cupped, in order for them to end up in the same orientation on the fabric you must choose which side (concave or convex) should always be facing the beads. Most costumes are made with flat sequins, so this isn't an issue. When sequins are cupped, it's most typical for the cup of the bead to face out, although my Silver Lotus bedlah is made completely of cupped sequins facing in (disco ball affect).
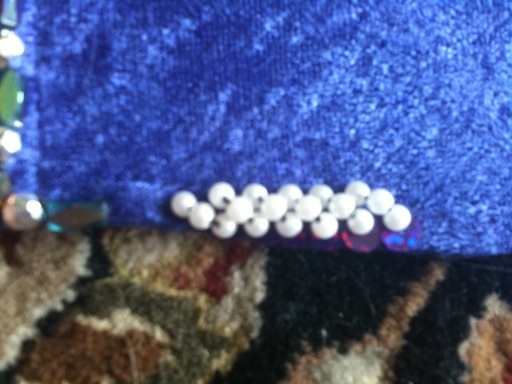
Here is an example where I've used three small pearls and a single flat purple sequin on each stitch. It's hard to see the sequin on the edge because it so closely matches the fabric, but it would still adds a touch of shine when the light would hit it. You can choose to use a sequin on only one end of your stitch.
The example pictured below also has sequins on either side of seed beads, however instead of a diagonal stitch, this is done with a straight stitch. This type of beading is most commonly done on the edges of chiffon veils, the gores in trumpet skirts, the hem of a circle skirt, arm drapes, and really anything thin and flowy. Four to six seed beads span the distance between the sequins, and because not many beads are used, they are typically the same color as the sequins. Really, their purpose is functional as a way to keep the sequins on while hiding the thread. This type of beading is also used to fill whole areas - cover entire bras. This is most typically done in mid to low market Turkish costumes. Fill-a-space beading methods will be covered in more detail below.
Up until this point all of our beading examples could be put on stretch fabrics and stretch with the fabric (yes, even the previous one with the straight stitch, because the arc of seed bead can flatten when stretched). But this next example isn't so flexible. They are large beads, in this example plastic silver beads and glass iridescent beads, each sewn directly to the fabric with a chain stitch. Though you don't need to sweat about getting the needle through the the two threads of the previous stitch with this beading, you will be doing the airplane loop-d-loop movement with the needle so that the beads are as close together as possible. This type of beading might be done on the edge of a belt or bra, and it has a very jewelry-type look to it.

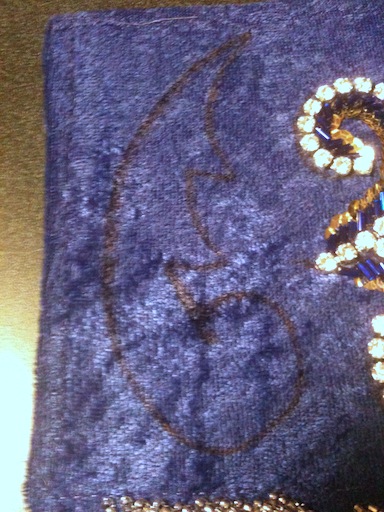
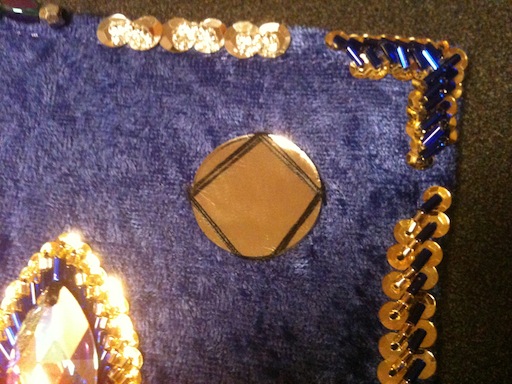
To draw a shape you can use a shard of bar soap, a fabric pencil, or if you're really brave - a magic marker. The ancient Egyptians used red paint to make rough drafts of their tomb carvings, and then the masters would correct them in black (magic marker?), so if you draw out your shapes before you create them you're in good company. (Determining how these shapes should be spaced on your costume is discussed in more detail on the Design page.)
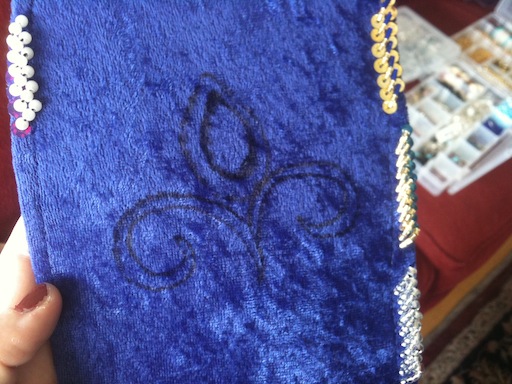
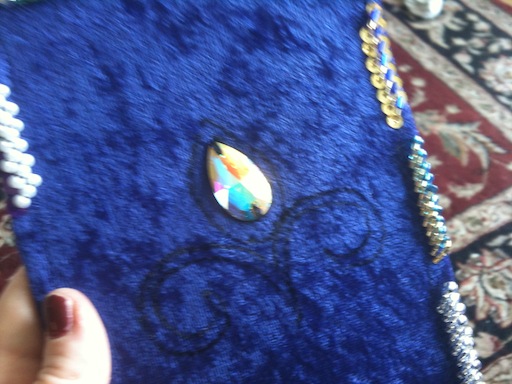
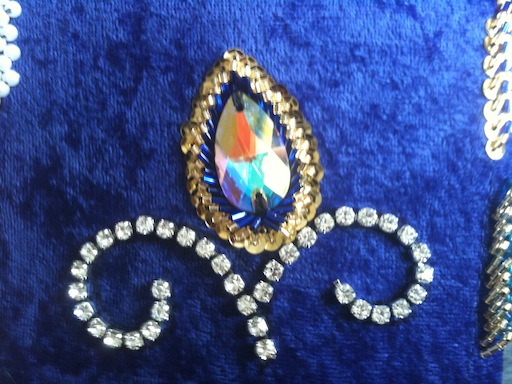
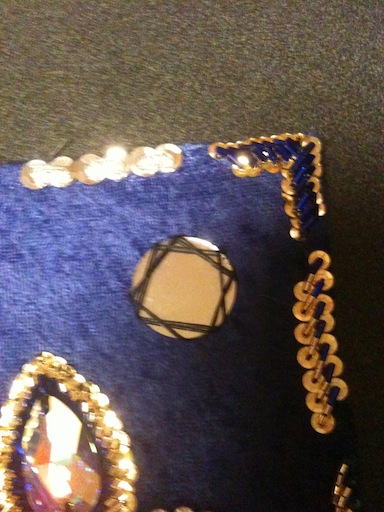
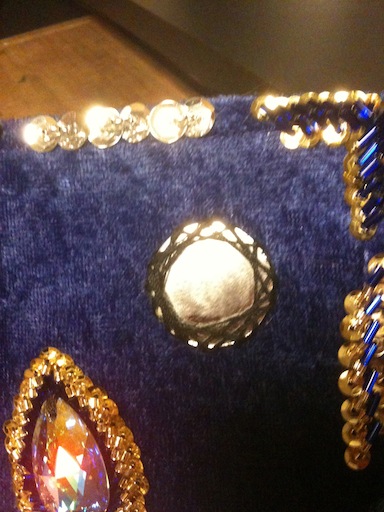
Sew-On Jewels: Jewels come in a variety of shapes, sizes, colors, and materials. The jewels used on costumes should have at least two holes in them, or should be mounted in metal that can be sewn on. Glue just doesn't cut it. If someone tries to sell you a costume with gems not sewn on but instead "bedazzled" or hot pressed onto fabric, do not buy it. It's a cheap imitation that will fall apart if actually danced in. In the shape I drew on my Beading Doodle Pad, I made a space for a tear-drop shaped Swarovski crystal.
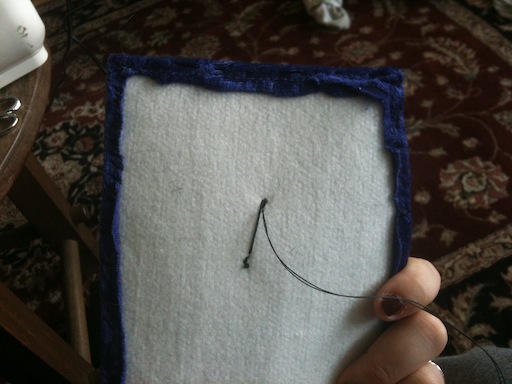
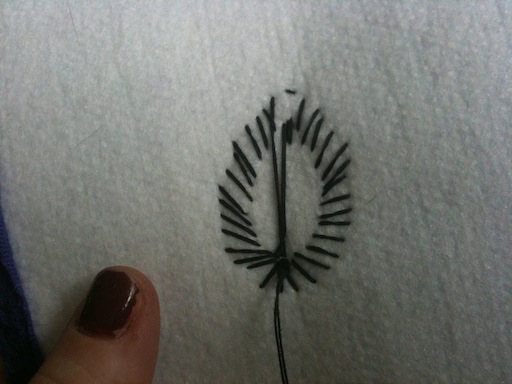
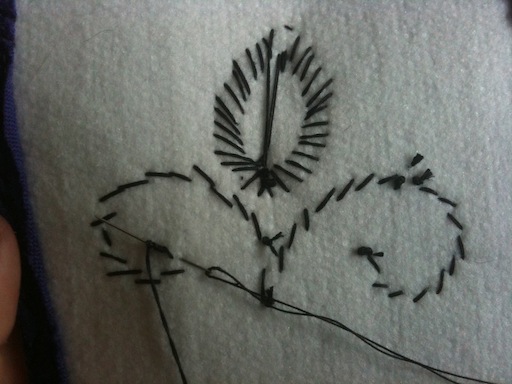
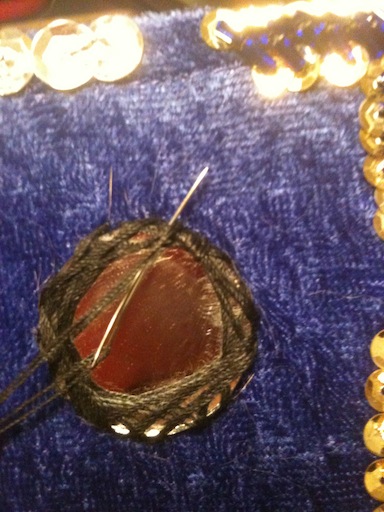
Here are how the stitches look on the back. Typically I'd use white thread, but to make it easier to see I've used black. I go around each hole about three times. You can knot the thread at this point, or continue to bead without knotting it.
I'm edging the jewel in a sequin, two gold hex-cut seed beads, and a blue bugle bead. I chose to start each stitch on the sequin end, and end closer to the jewel, but that's just preference.
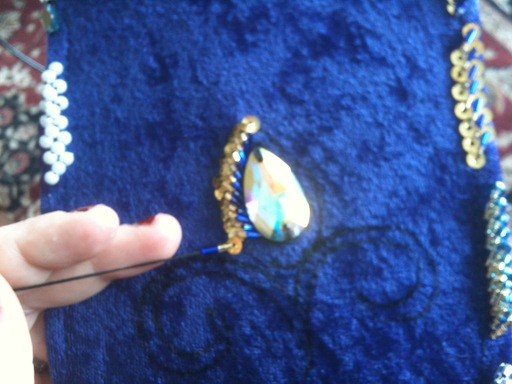
I got most of the way down on one side, jumped back up to the top and went most of the way down the other side. The bottom is a little tricky though. Since I've been using diagonal stitches, the bugle beads from the two sides have already touched on the bottom of the jewel, but the sequins haven't yet. This is one of those "do the best you can" things.
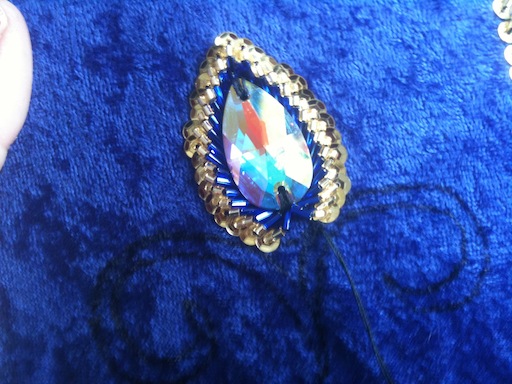
For this case, my solution was to omit the blue bugle beads and add a few more beaded stitches to finish the bottom.

Here's how my stitches look. You can learn a lot from looking at the back of things.
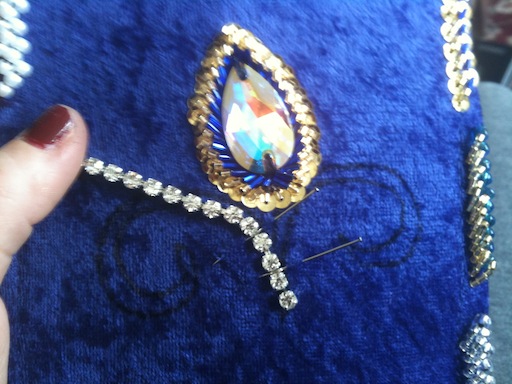
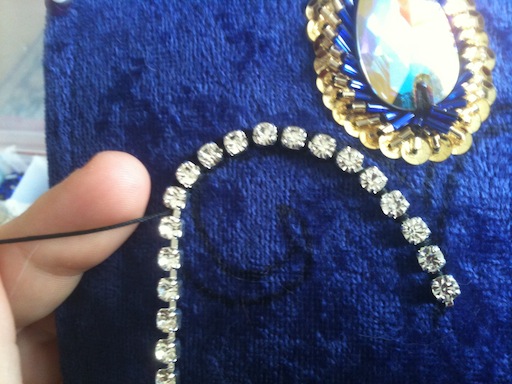
Diamond Trim: Diamond trim is also called rhinestone chain, or crystal chain. I've decided to use diamond trim in silver metal for my little curly lines. You can just hold it on the drawn mark as you sew, or you can pin it in place to make life easier. I like to wait till I sew or pin most of it on before I cut it because it's so easy to be off by a diamond or two. Do not use your fabulous fabric scissors to cut it - use wire cutters, kitchen scissors, or any old house scissors.
You'll put a stitch over the metal between each diamond. If this needs to go on stretch fabric, like a trumpet skirt, push the diamonds close together on the metal when you pin and stitch them, so that as the garment stretches the diamond trim can grow a little. There will be limitations to how much it can stretch, but as long as your diamond strands aren't perfectly horizontal, the stretch fabric around it can compensate to some degree.
This could be finished, just as it is. It's minimalist, but pretty. But keep in mind that bellydance costumes are most often viewed from a distance of about 15 feet, so it couldn't hurt to add a line of beading to one or both sides of the diamond trim.
Here are my stitches, and I'm just about to end it with a knot.
To add a little width, I've added a line of beading made of a single blue bugle bead and a gold sequin. It's a variation on the beading done around the jewel. This type of high contrast beading, where the beads and sequins are different colors and diamond trim is outlined one or more times, is very typical of Bella Costumes.
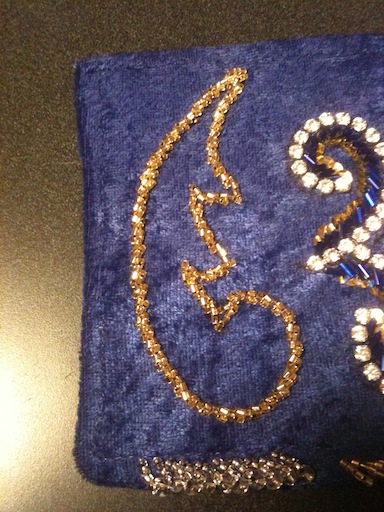
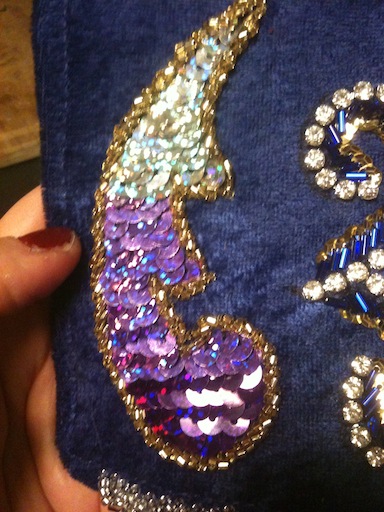
The previous exampled was made up of beaded lines and singular sewn on notions. But there is another type of shape - one with positive space (space that can be filled in). Positive space is the foreground of a picture; negative space is the background. This is discussed in more detail on the Design page. Always bead your positive spaces first, and then deal with the negative spaces. This next shape is something I tend to call scroll-work, though you could use this method for any shape you want to fill in. The scroll-work shape seems to be a signature of Hanan costumes (one of my favorite designers). It is a curved line, pointed at one end and ending in a round ball at the other. On the inner curve there are jagged edges. On a costume these would be placed in a vertical line, curving alternately to the left and right, down the front and back of a skirt, creating almost a Sine wave. (The sun has gone down, so my lighting is different.)
I've outlined the shape with a line of beading. I used four gold hex-cut seed beads per diagonal stitch.
To fill in the positive space, I sewed sequins in rows starting at the bottom of the scroll and working my way up. The stitches will be hidden by the row of sequins above them. The rows run right to left, then left to right, alternating, to save thread. The reason I start at the bottom is because it will cause the face of the sequins to have a slight angle upwards, catching more light. On a bra you may choose to start rows of sequins on the sides and move towards the center of the bra (sternum).
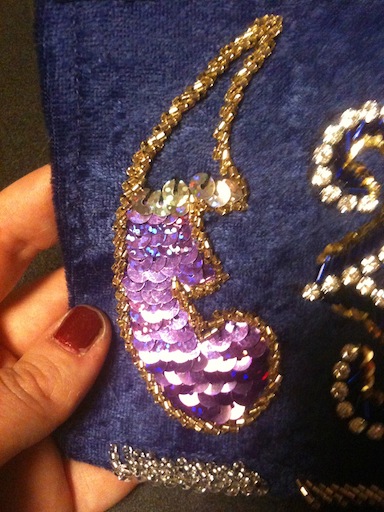
When Hanan does this type of decoration, they often use three colors of sequins. They could be something contrasting, like green, pink and gold; or as in this example, they could use a dark, medium and light color in the same hue.
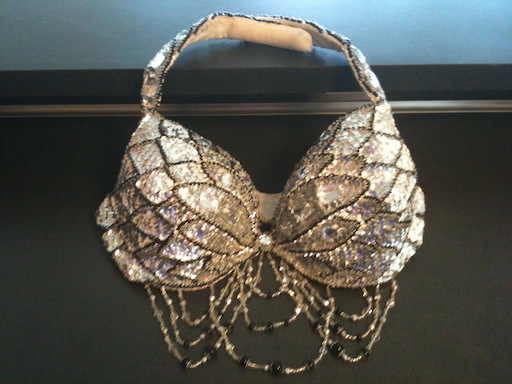
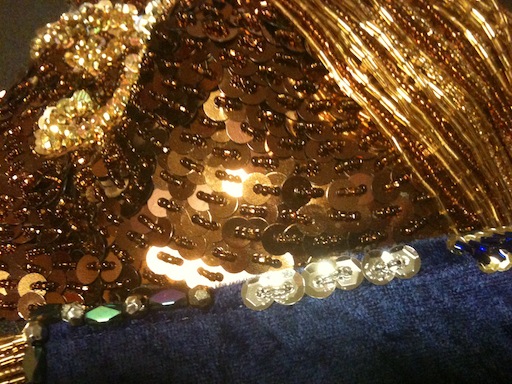
For negative space most of the time we just let the fabric of the costume show. But if you want a costume that is literally covered in sequins, you could fill in the negative space. Here is a picture of my very first bedlah, bought from Topkapi Designs, a Turkish business. It was just $200. As you can see, the bra is covered in the same beading method as I had described earlier as a type of line - sequin, several seed beads, sequin, sewn with a straight stitch. I've laid my Beading Doodle Pad on top of the cup so you can see the similarity. On the costume, these rows of sequins and beads run right to left and the left to right, alternating. I actually significantly altered the bra cups of this costume, turning them from a C cup to a DD, so not everything you see is the original cup, but because I understood how this costume was made and used the sequins from the accessories to make the change, you'd never be able to tell.
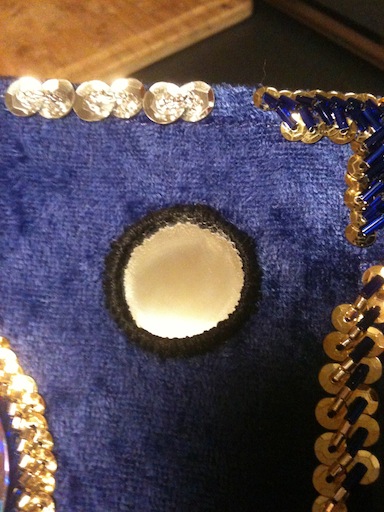
Shisha mirrors are a unique decoration. Made of a solid circle of glass, they are attached to the costume by sewing around the edges. Once you determine the spot where you'd like the shisha to go, you could choose to use a hot glue gun to hold it in place as you sew, or you could just use your thumb until you get your first four stitches down. The stitches will be in the shape of a square.
The second square of stitches should be slightly offset.
Continue adding squares until you've got a thorough level of coverage.
We're going to wrap those stitches with thread. Come through the fabric from the back, insert the needle under the stitches, and go back through the fabric by the edge of the mirror.
Continue this all around the mirror.
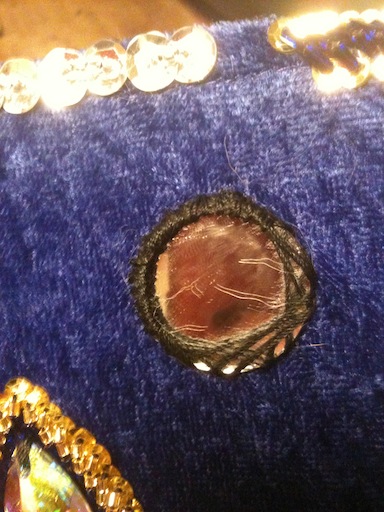
And then you're done!
Coins come in different colors, weights and finishes. For the thin stamped gold or silver coins attached to the end of fringe, that is covered on the Fringe page. The Tribal style coins that have loops of metal soldered to them are more often used to cover Tribal bras. It's very simple - sew around the loop 3 to 5 times and knot in the back.
To cover a bra, start at the bottom making evenly spaced rows of coins, with each row filling in the gaps of the one below it. The result will look a little like fish scales.
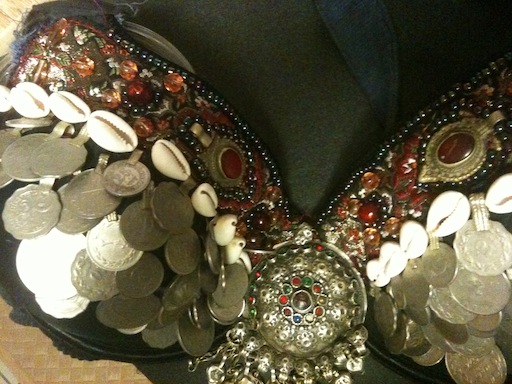
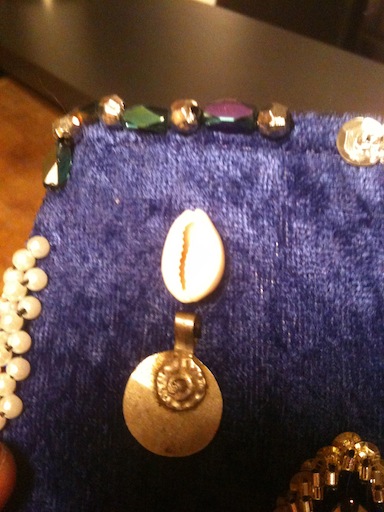
For cowry shells, find a distributor that sells cowries with holes in the back. Ideally you should be able to insert your needle cleanly from one hole to the other, but sometimes you may need to come through the top of the shell and then go back out the other hole. It depends on the shell. In any case, you want to come through the fabric, go through both holes, and go back into the fabric.
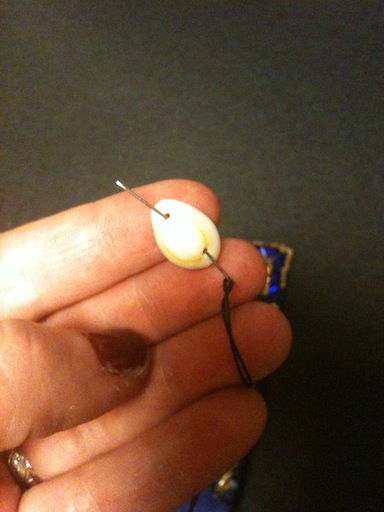
Do this stitch several times to reinforce the cowry, and you're done. On the Tribal bra above I show one way to use cowry shells when decorating a bra, but there are a million right ways. Do what looks good to you.
And here is our Beading Doodle Pad covered in all the fabulous things we've done so far. Is it just me or does it kinda look like a face? I will call it George.