
The base for your bellydance costume bra needs to be stiff enough in the cups to handle all the decorations you're going to sew onto it. Most bras available in stores are designed to hold you up, but not to hold up an additional 5 lbs of bling. For a minimalist bra without decorations, you could get away with covering a regular bra with stretch fabric - although it's recommended to replace the straps so that it doesn't look like you're walking around in your underwear. Though it is possible to make a stiff bra cup completely from scratch out of buckram or interfacing, it's not the most effective solution when there are so many inexpensive and easy alternatives available. Here's a walk through of common options, in the order of my own preference.
~Buy a Bra with Stiff Cups~Reinforce a Regular Bra
~Buy Costume Cups
~Make Your Own Custom Cups
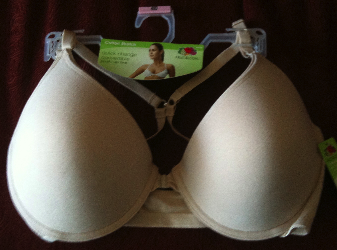
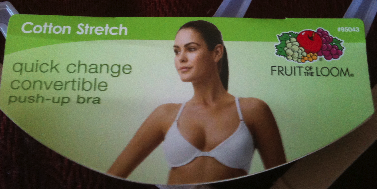
This is by far my favorite option. My favorite bra base was a really great bra you could buy at Walmart for under $10. It was made by Fruit of the Loom, and the style is called "Quick Change Convertible Push Up Bra". This bra hooks in the front, and to handle the stresses of a front closure and straps that can be arranged multiple ways, they've super-enginneered the bra cups. They're made of stiff foam, which is thicker towards the bottoms of the cups, and have strong underwires on the cups. They're awesome, and I've made several costumes out of them. They require no reinforcement of any kind before you can cover and decorate them.
Sadly, this model is now out of production. But bra manufacturers are constantly updating their product lines, so keep an eye out for something similiar from this and other brands, like Hanes.
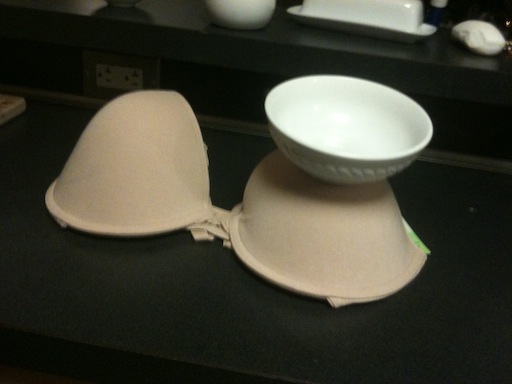
Here is a demonstration of how stiff and strong these cups are. I have balanced a ceramic cereal bowl on top of one of the cups. It would have been a bowl full of cherries, but I got a bit peckish.
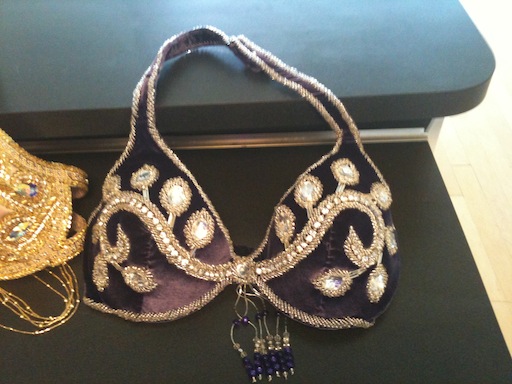
Here are a few costumes I've made with this base. My Purple Velvet with Silver Vines...
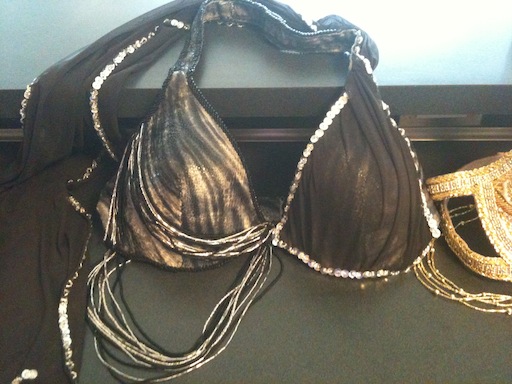
...my Smoke Costume...
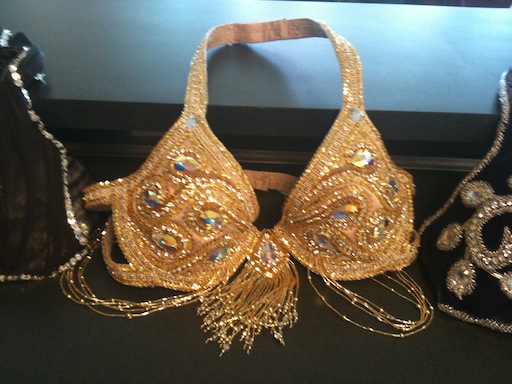
...and my Gold Filigree Bedlah.
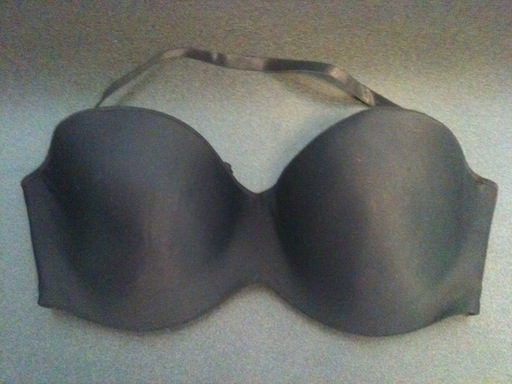
Fortunately, strapless bras are always on the market, and due to the nature of holding up "the girls" without support from above, the cups of strapless bras have to be sufficient to do the job. I have used the Lilyette brand Strapless Bra with Adjustable Straps distributed by Maidenform, Inc. The cups are not nearly as stiff as the Fruit of the Loom $10 special, and this bra base can cost as much as $50 at Macy's when not on sale. One really nice thing about it though is that the side straps are each made up of two strips of 3" wide heavy duty elastic bands. When using this base, I tend to use the existing side straps instead of replacing them. They're very comfy. I recommend less heavy beading on these cups than say my Gold Filigree or Silver Lotus examples, unless you also reinforce them with a bit of interfacing.
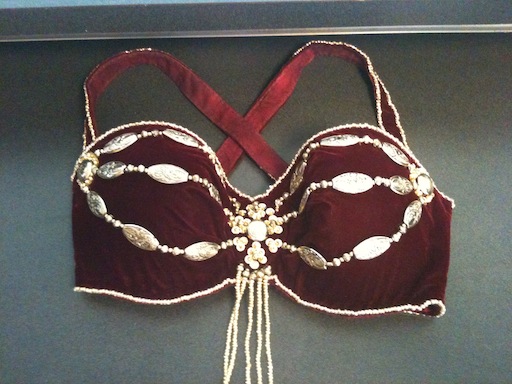
Here's a pictures of my Burgundy Velvet with Gold which I made with this type of base. The bra straps cross in the back and attach to the inside of the cup with hook and bars.
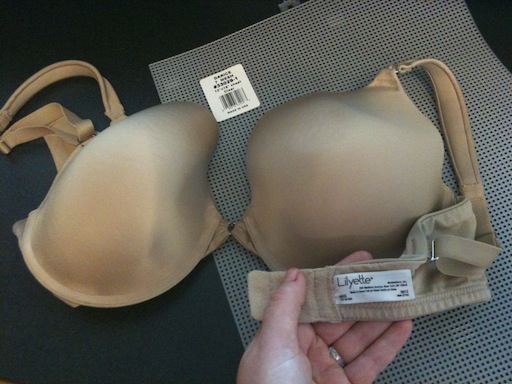
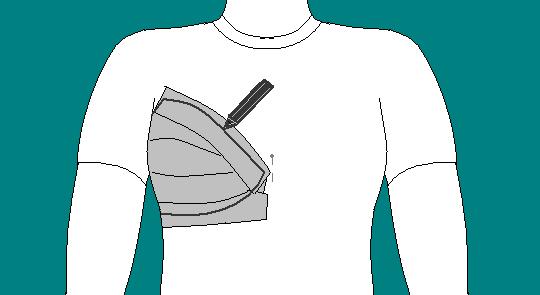
Here is a Lilyette brand bra, distributed by Maidenform, Inc. It is designed with straps that can be detached in the back and has metal connectors between the two cups and at the top of the cups where the straps attached. The purpose of these connectors are to let the cups adjust to the angles of your body easily. The cups are fairly soft and can be crumpled in your hand, but they do have an underwire. I loved the shape and fit of this bra on myself so much that I decided to reinforce it to make it strong enough. To do that, I used the plastic mesh you can see lying underneath the bra. This mesh is sold in craft stores and used for making little carpet wall hangings and other fun crafts with yarn. The holes in the mesh will allow you to sew through it, while its stiffness will hold up any decorations. There are similar methods that can be done with interfacing or buckram, and the reinforcement can be put on the inside of the cup vs the outside, but to date I have never done those methods.
I wish I had taken a picture before I had covered it in fabric, but I'm afraid I didn't. Fortunately you can see the edges of the plastic mesh making ridges under the fabric in the picture below. Here's how I did it. While wearing the bra and looking in a mirror, I laid one corner of the plastic mesh on the center corner of the bra, and laid the long edge of the plastic along the top inner edge of the cup, pinning it as I went. I then continued down the outer edge of the cup. Once those were pinned in place, I used kitchen scissors to cut the plastic in several places to make it lay better in the middle of the cup - which included a rectangle across the inner edge, and a vertical seam from the nipple down to the center bottom of the cup. The exact shape of what you'd do for your bra will depend on your shape and size.
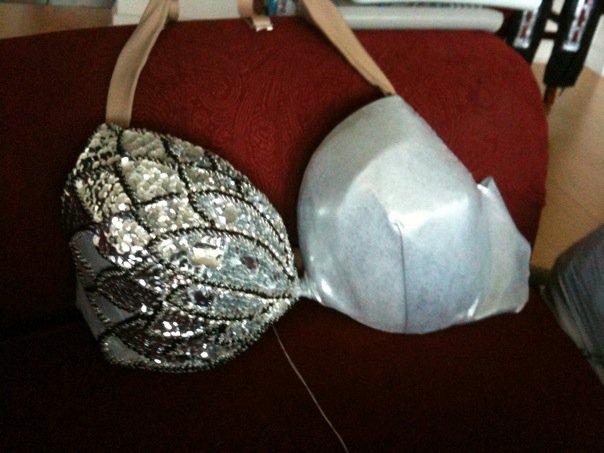
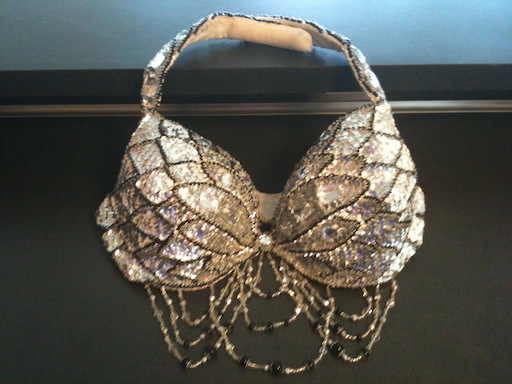
To stitch the mesh in place, I just sewed down the edges of the plastic to the bra, and even sewed the plastic to the plastic where there were seams. The plus side of this method is you can use any bra. The down side is that plastic mesh doesn't make very smooth seams, and unless you cover the bra significantly, the edges will be noticeable. Here is a picture of the finished bra. It is my Silver Lotus design. I think if I had used buckram or interfacing for something this embellished, it might have collapsed under the weight. It's possible that this bra is bullet proof.
You might think that this should be the first option, since these are made specifically for dance costumes. Some seamstresses may prefer them.
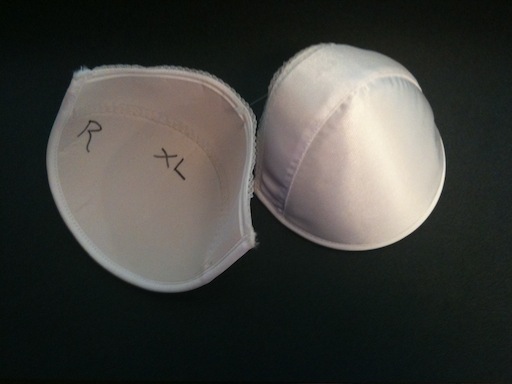
I, however, do not. I realize I am very biased, being a woman of large breasts. It is my opinion that these cups look more normal in the smaller sizes. But as the sizes get larger, the angle at which the two pieces meet becomes more acute, creating the dreaded Kermit the Frog boobs. A friend of mine has a beautiful Tribal bra made with these cups, but she's a B or C. I think the many embellishments of something like a Tribal bra could help hide the characteristic angle of the cups. These can be purchased through SugarPetals.com.
I used this brand of bra cups in the Half-Made Blue Faux-Bella Alteration Project. Check out some of the YouTube videos embedded on that page to see how I covered, attached and decorated them, and how the finished product looks. They're still pretty pointy. lol!
For details on how to connect your bra cups to straps, check out the page on Bra Straps. For instructions on how to cover a bra with decorative fabric (which you'd do before you bead it) check out the page on How to Cover a Bra.
I talk about this also in the How to Alter Cup Size Tutorial. This method is especially useful for ladies with extra large breasts who have difficulty finding their size in (non pointy) costuming cups or stiff cupped bras off the rack. To make your own custom cups, first we have to make a model of your breast shape with duct tape - a strong, gray, thick tape found in hardware stores. Here's how you do it.
Put on a old tee-shirt over a bra that lifts and supports you the way you'd like. Then pin your tee-shirt to your bra in the center front and to the far side (off the cup) of one of your breasts. (Don't overly stretch the tee-shirt, because stretched fabric will make your duct tape model shrivel once it's no longer on you.) Cover the cup area with strips of duct tape, pressing the tape against the bra underneath so that it mimics its shape of your bra cup as closely as possible. When your breast is completely covered, draw with magic marker where you want the edges of the cup to be (top, bottom, side). Cut it out on the lines you drew (this will destroy your old tee-shirt).
Press the bottom half of the cup flat on a table - as flat as you can get it to be. Odds are you'll be able to get an eye-shaped section to lay flat. Trace this shape with the marker and then cut it out. Now take the remaining duct tape model and try to lay it flat on the table. If it can be flat as it is, great - if not, get as much of it flat as you can starting from the bottom, draw the new edge and cut that out. What you're doing is making patterns of the shapes of flat interfacing it will take to mimic the curves of your breasts. When you lay your flat pattern pieces (probably 2 or 3 pieces total) on the interfacing, make the interfacing pieces have a margin of 1/4 an inch all the way around, so that the pieces will over lap each other by half an inch. Pin them together, and zig-zag stitch them in place. Now, take off your bra and hold the cup up to your breast and see how it feels - if it doesn't fit perfectly, or you need to adjust it, realign the seams. You can even cut out slightly different pieces if your first try doesn't work just right. Interfacing isn't very expensive. Once you're happy with the shape, you can add an underwire if you would like. If you can't find an underwire in your size to buy or one from an old bra, go to the hardware store and buy stiff enough wire. Sew a casing (a fabric or thread pocket for the underwire to be in) on the bottom of your cup either by hand or with a machine. Be sure to bend in the ends of the wire so they don't pierce your fabric over time. Make one to match for the other side, and you now have custom cups!